Gemini Connection Guide
※ Logging into the app (Google account) is separate. It is for your Kizuna account and does not replace the Gemini API key.
Google AI Studio / Kizuna Desktop screens may change with updates.
* Screenshots are shown in Japanese.
What is Gemini? How is it used in the app?
Gemini is Google's generative AI. In Kizuna Desktop, it is mainly used for the following purposes (varies by settings and situation):
- Conversation: Generating responses, improving naturalness and consistency of interactions
- Context-aware suggestions: Suggesting how to proceed with work or the next step
- Image understanding (Vision): Reading images from screenshots/cameras to help understand the situation (when enabled)
※ Which data is sent depends on your settings. Data handling (e.g., use for training) may differ between Google's free and paid tiers.
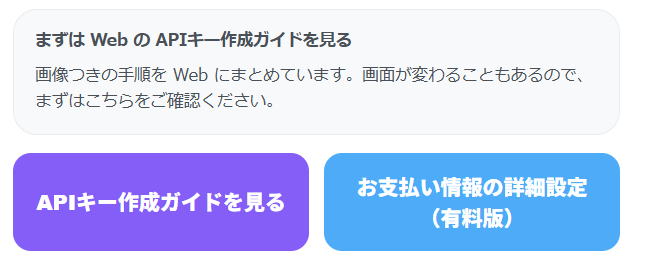
API Key Method
How to issue a key in Google AI Studio and paste it into the app (standard connection method).
API Key Method
How to issue a key in Google AI Studio and paste it into the app (standard connection method).
What is an API Key?
It is a "key" for Kizuna Desktop to access Gemini. You paste the created key into the app to use it.
In the free tier, sent content and answers may be used for product improvement. In the paid service, it is stated that prompts and answers are not used for product improvement (training, etc.).
Reference: Gemini API Additional Terms of ServiceFree Tier: Issuing and Pasting API Key
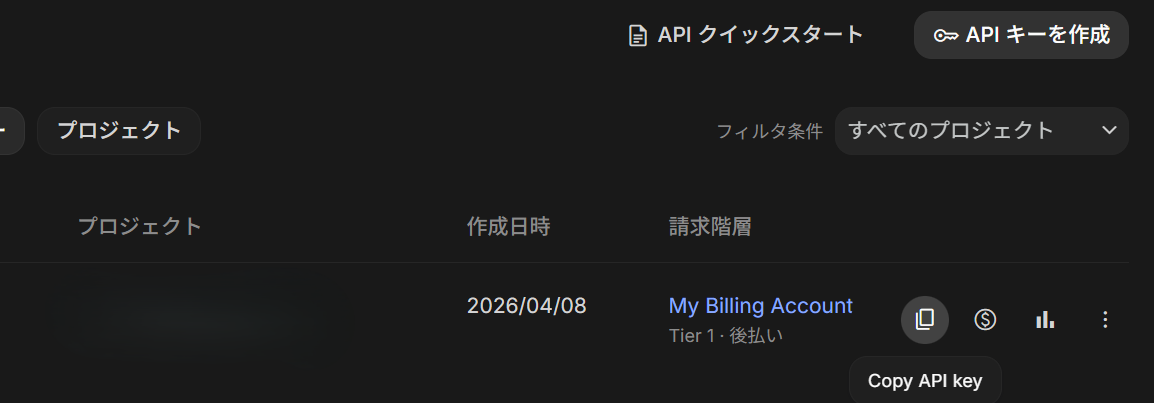
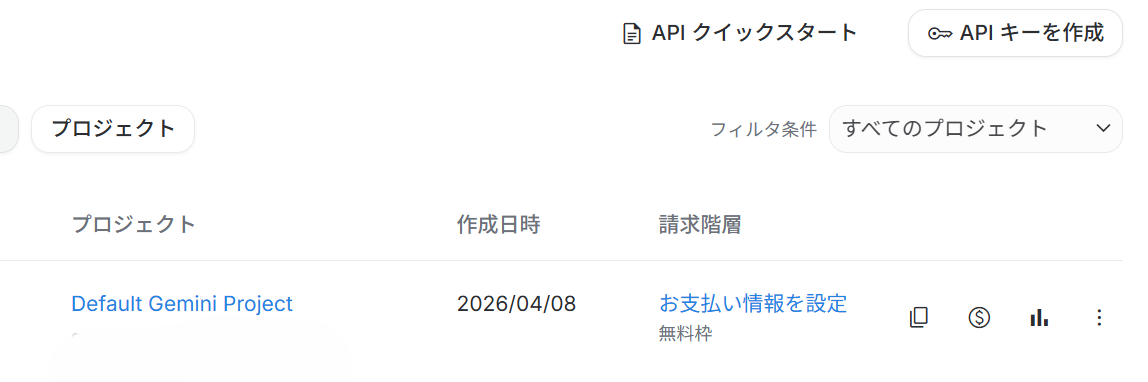
- Google AI Studio (API Keys) and go to API Keys.
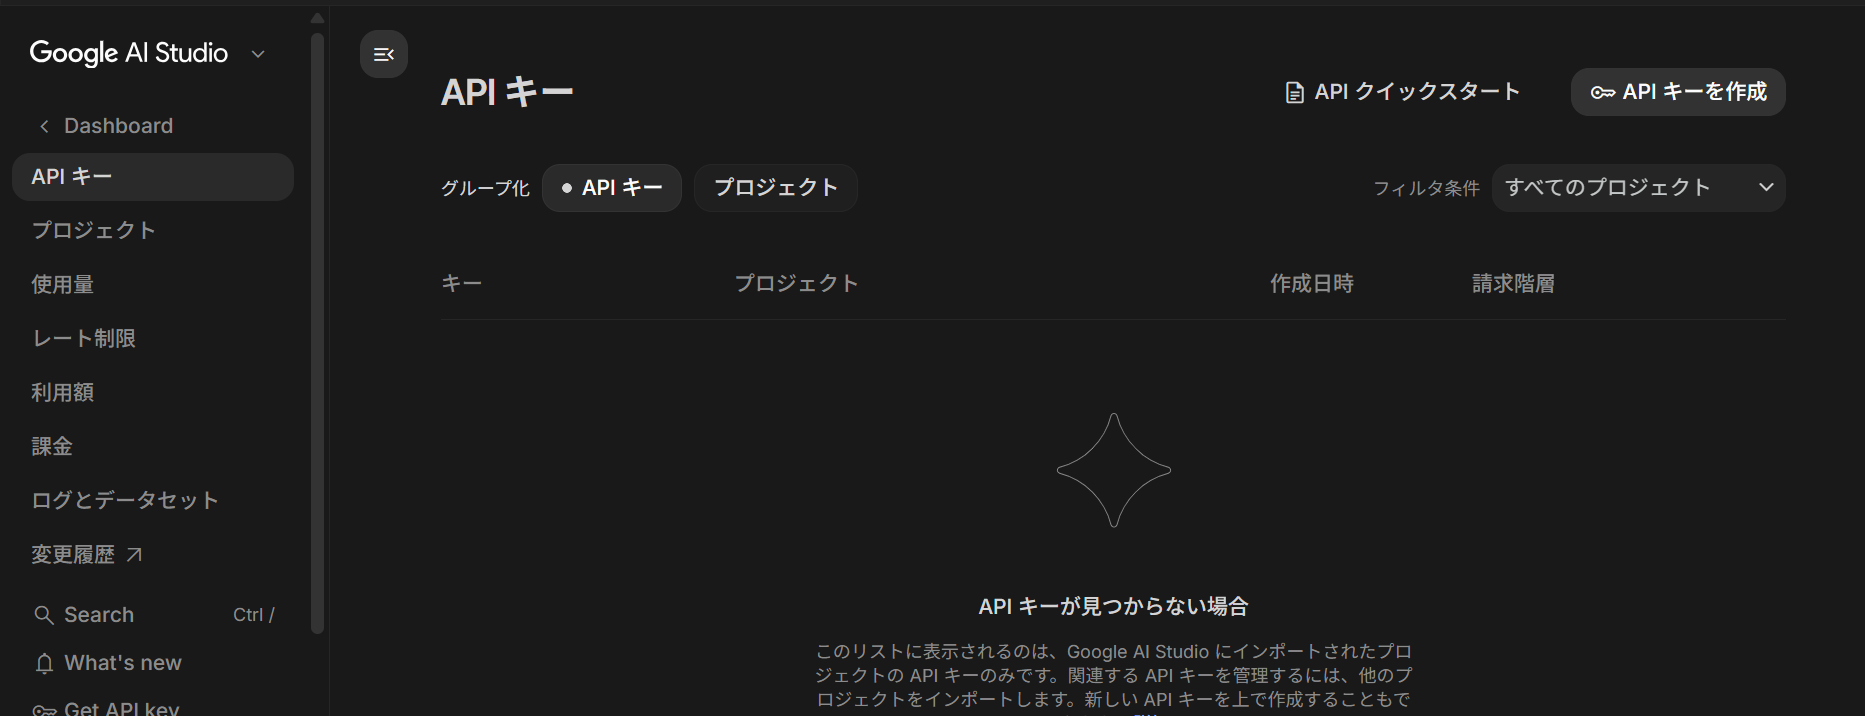 Click to enlarge
 - Click "Create API key" at the top right.Click to enlarge
- Choose a key name or project you want to import and press "Create key" (anything is basically OK).
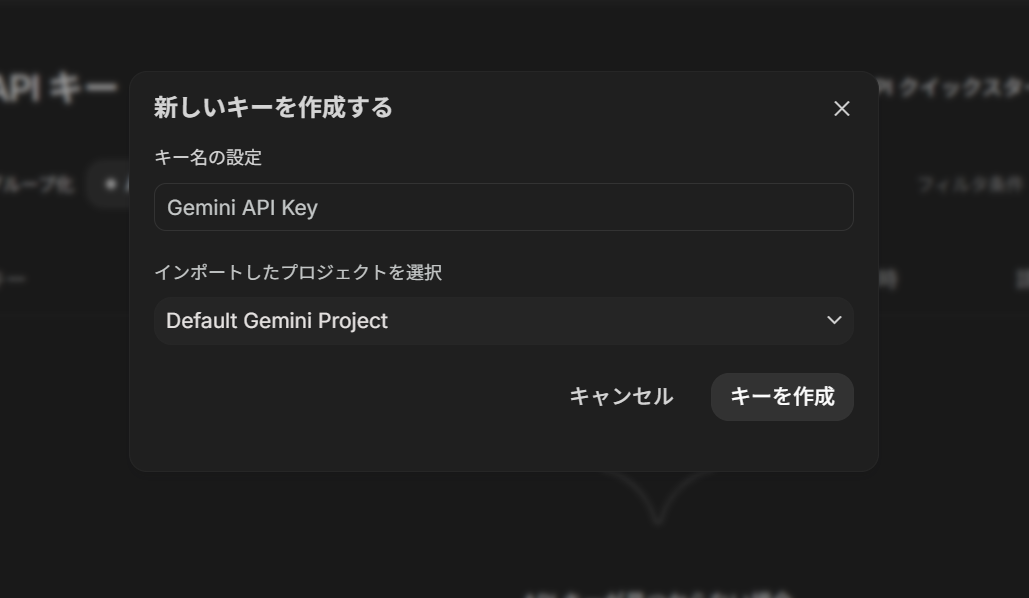 Click to enlarge
 - Copy the displayed API key (you can also use the copy button on the list screen).
 Click to enlarge
 - Launch Kizuna Desktop and log in with your Google account.
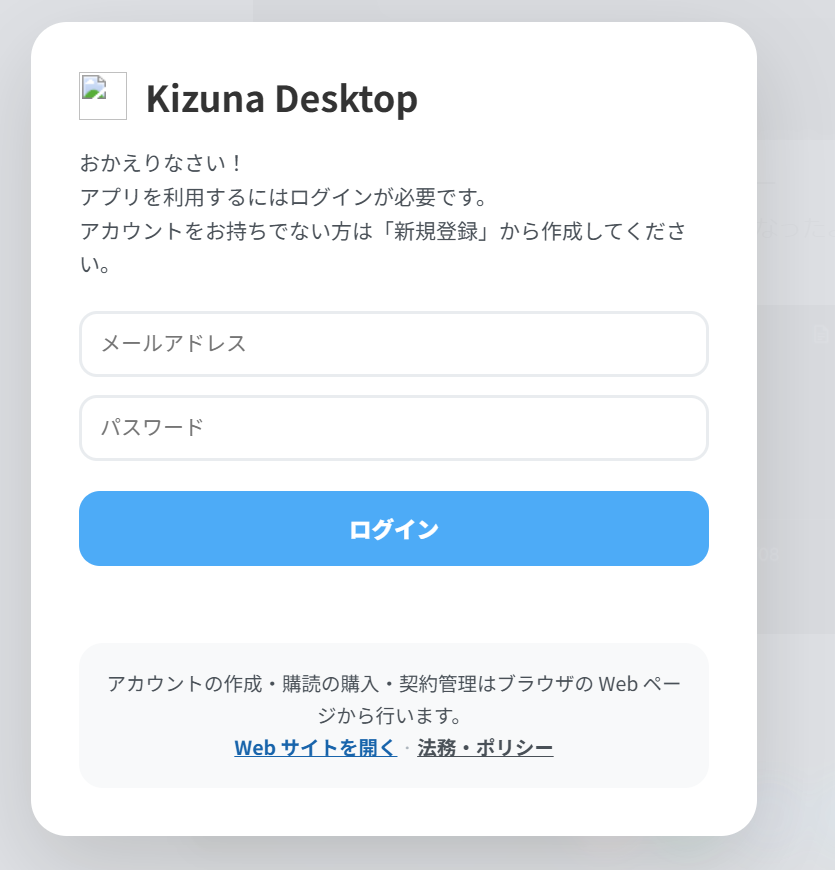 Click to enlarge
 - Paste the copied API key into the "Gemini/API Key" settings screen in the app.
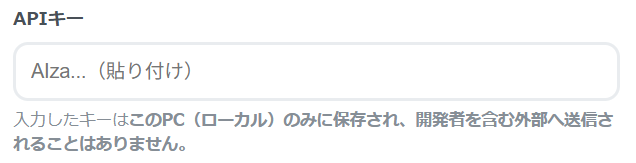 Click to enlarge
 - After choosing a model, press the "Confirm settings and enable" button to proceed.
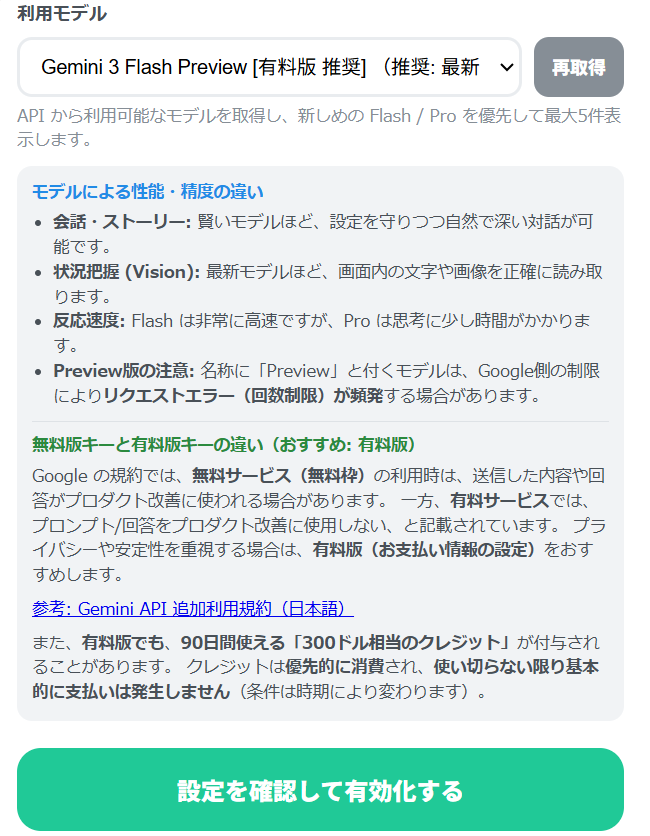 Click to enlarge
You can reconfigure it anytime from "Gemini/API Key Settings" in various settings even after the initial setup.
Paid Tier: Payment Settings and API Key
- First, create an API key from Google AI Studio (API Keys) following the same steps as the free tier.
 Click to enlarge
 - Click "Set up billing" in the guidance displayed after creating the key.
- Select your country, agree, and click continue.
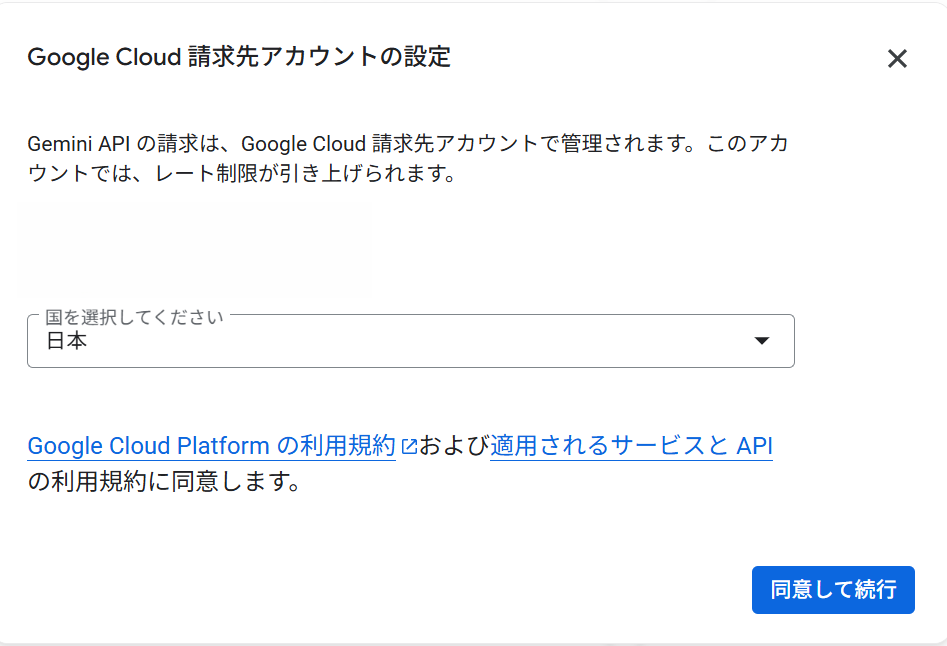 Click to enlarge
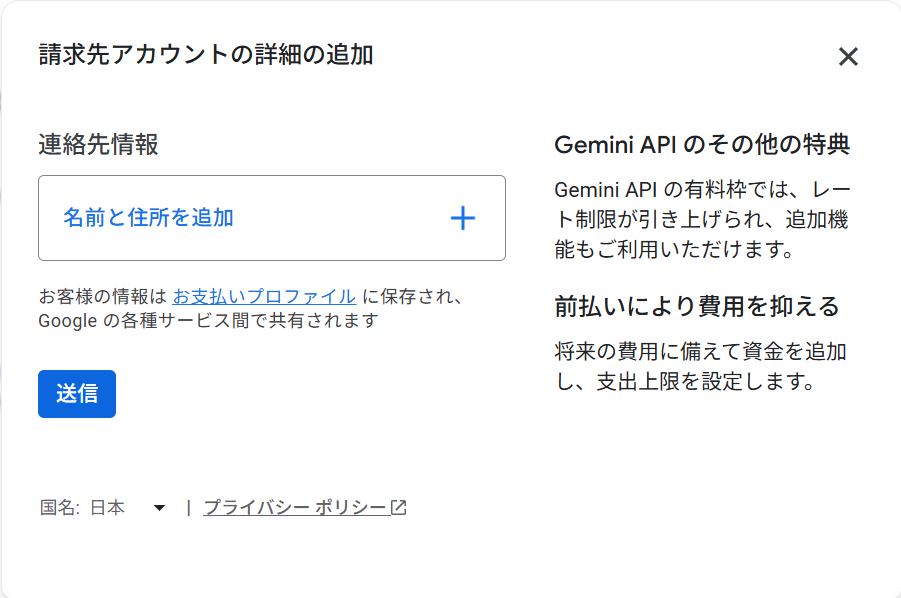
 - Enter contact information (name, address, etc.) and submit.
 Click to enlarge
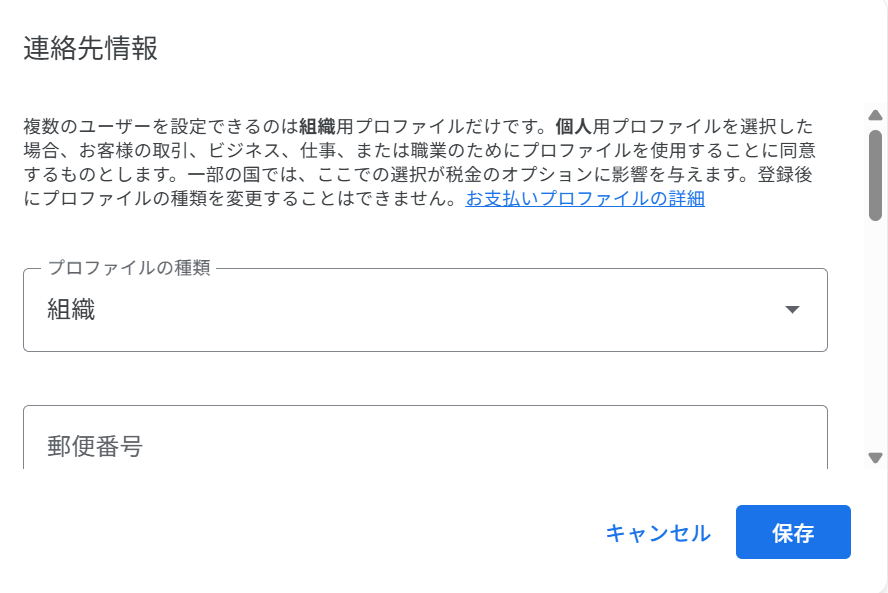 Click to enlarge
 - Add a payment method (card) and save.
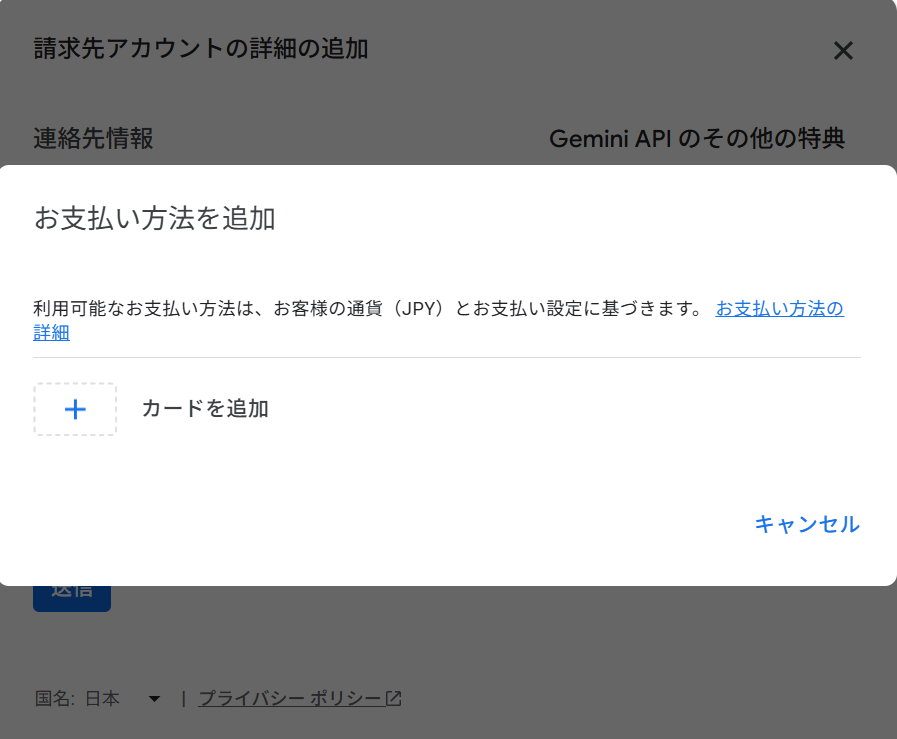 Click to enlargeKey PointWhen billing setup is complete, "$300 worth of credits" valid for 90 days may be granted (conditions vary by period). Credits are consumed preferentially, and basically no payment occurs until they are used up.
 - Rarely, the setting process may not finish. In that case, close it once and press "Set up billing" again to proceed.
- Once billing setup is complete, copy the API key and paste it into Kizuna Desktop (same as free tier).
- After choosing a model, press the "Confirm settings and enable" button to proceed.Click to enlarge
If the billing screen UI has changed, you can also refer to the Billing Guide (via Billing menu). Billing Guide (via Billing menu)
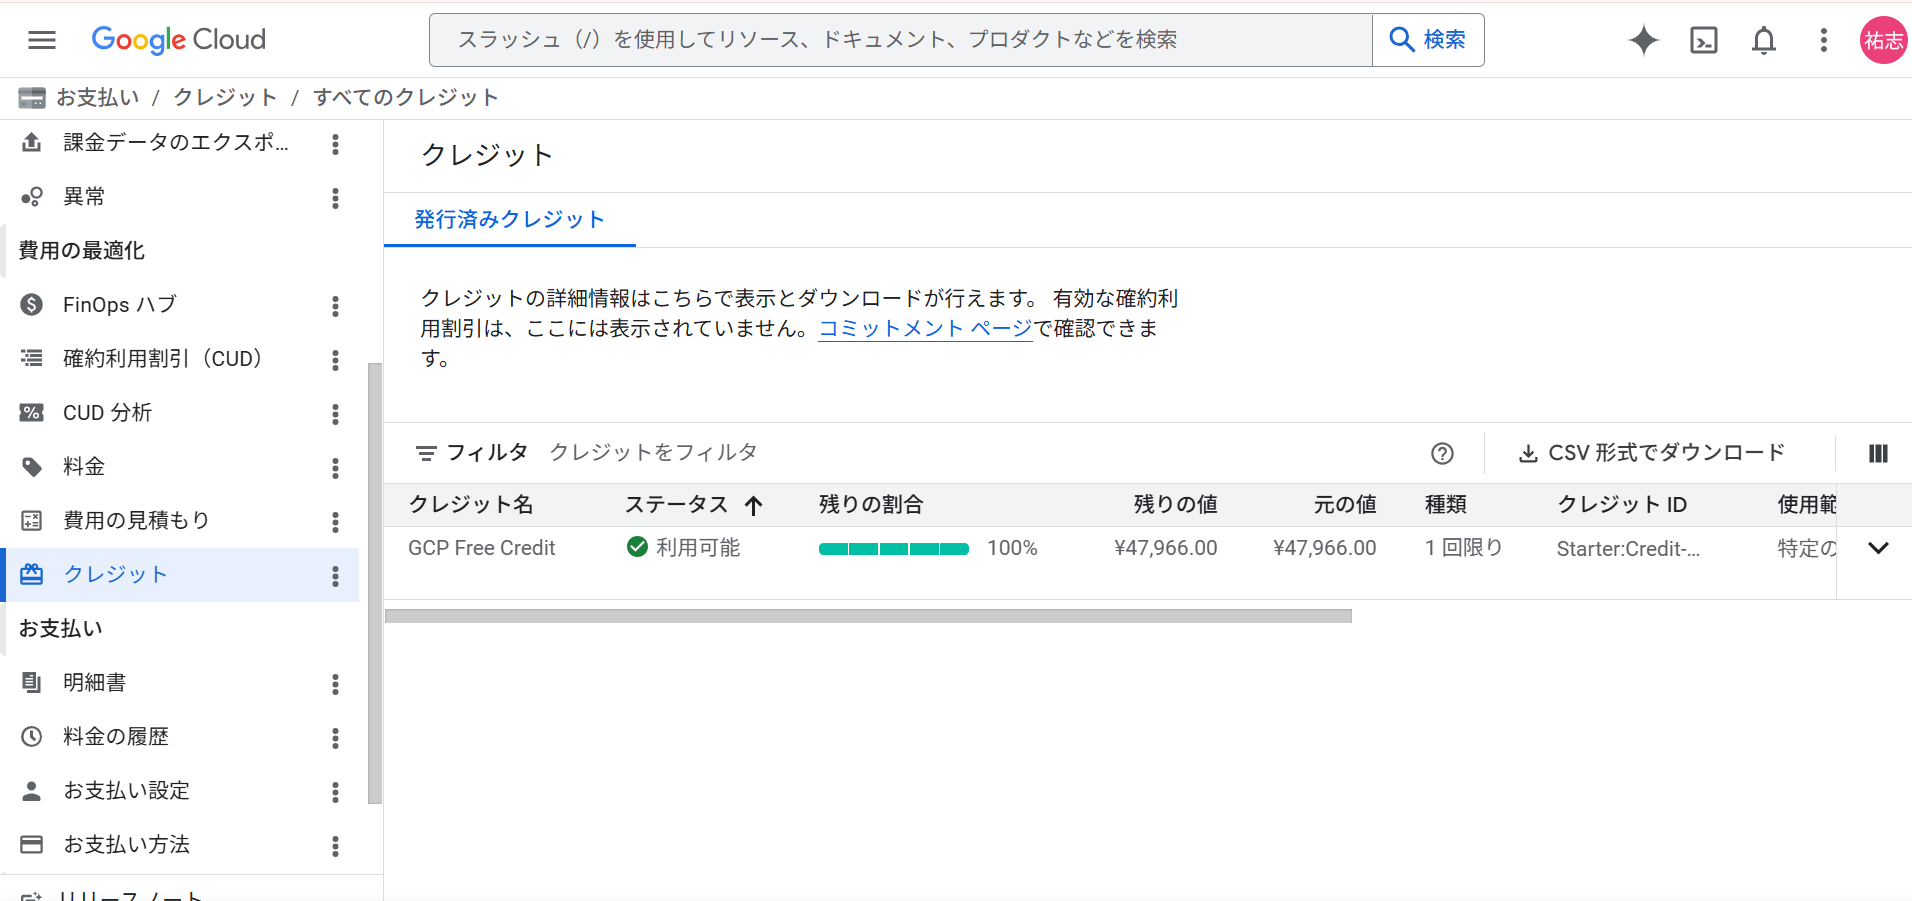
Supplement (Usage, Limits, Credit Confirmation, etc.)
You can check current usage and cost limits (budget) from "Usage" in the left menu.

It refers to the "Tier (usage limit)" on the Cloud side, so please rest assured it is not the charged amount.
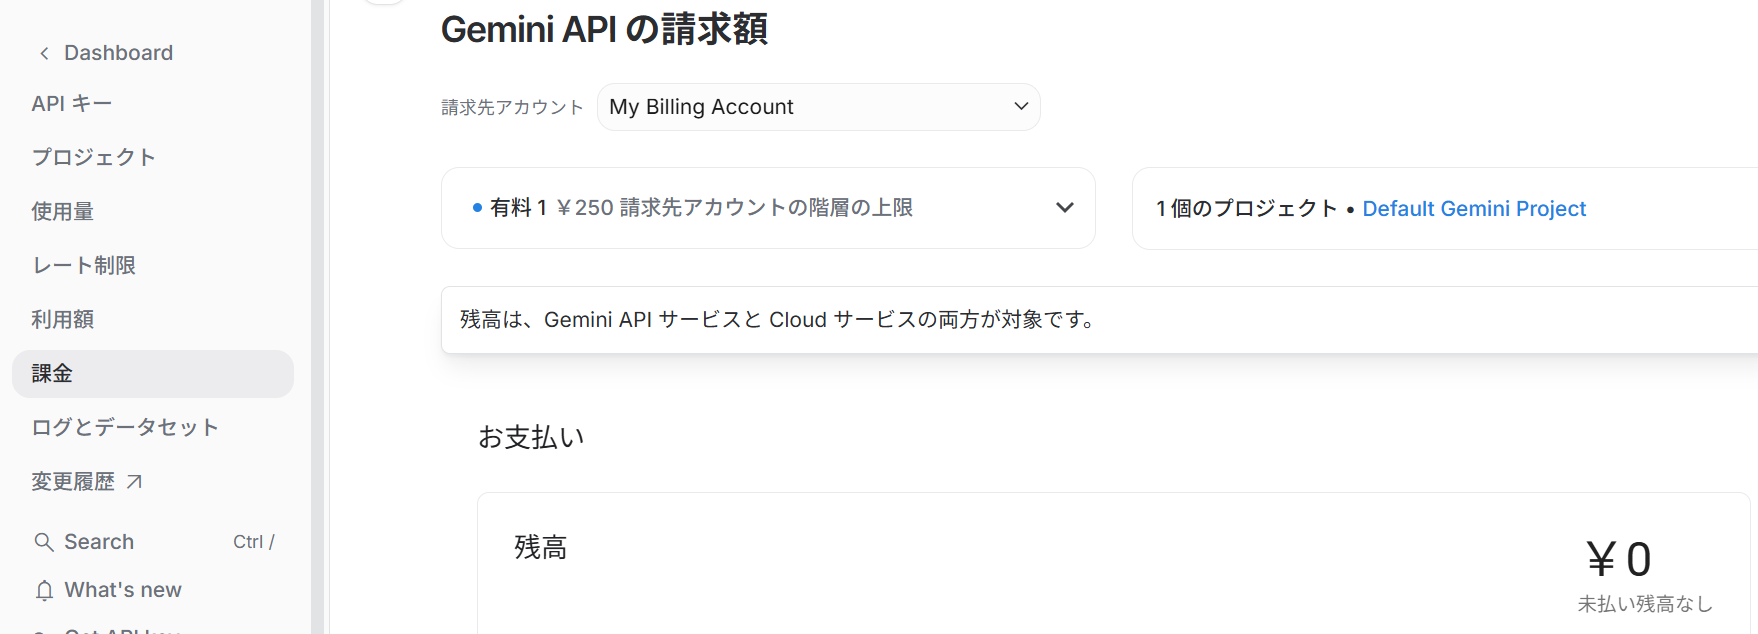
You can move to the Google Cloud detail screen from "Detailed Billing Settings (Paid Version)" in "Gemini/API Key Settings".